
XLS Tips for the V Planner
Changing the Row Height
Latest Version - V Planner V4.3V Planner 4.2, High School V Planner V4.2, and Homeschool Lesson Planner V4 are ready for use. Download from the Member's area. ![]()
How to change the the height of the rows.
Lengthening the height of the rows is generally done from the row boundaries. There is another way to do it via file menus at the top of the window but how to do that varies between some software versions and I will not go into software version specifics for this because I'm going to keep this simple.

 The methods to increase the row height described on this page will involve the Row Boundary. The Row Boundary is the line between Row Headers. The row headers and row boundaries are located all the way to the left side of the worksheet.
Tip: When placing the cursor in a row boundary, the cursor will change to something like this ![]() when it is in the right place.
when it is in the right place.
To Change the Height of One Row by Dragging
- Place the cursor on the row boundary under the row header.
- Click the left mouse button
- Drag the row boundary either up or down, depending on if the row needs to be shorter or taller.
To "AutoFit" the Height to Contents of One Row by Double-Clicking
This method does not always work.
- Place the cursor on the row boundary under the row header.
- Double-click the left mouse button
To Change the Height of Several Rows by Dragging
This usually causes all of the selected rows to become the same height.
- Hold down the Ctrl key on your keyboard
- Place the cursor at the first row header of the group of rows that you want to change
- Click the left mouse button and
- Select the rest of the rows that you want to change
- Place the cursor in one of the row boundaries
- Click the left mouse button and hold it down
- Wait for the row height information to appear (this step might be unnecessary)
- Drag the row boundary either up or down, depending on if the rows needs to be shorter or taller.
To "AutoFit" the Height to Contents of Several Rows by Double-Clicking
This usually causes all of the selected rows to autofit the contents. This does not always work.
- Hold down the Ctrl key on your keyboard
- Place the cursor at the first row header of the group of rows that you want to change
- Click the left mouse button and
- Select the rest of the rows that you want to change
- Place the cursor in one of the row boundaries
- Double-click the left mouse button
Related Video Online:
V Planner- Lesson Planners - Expand The Rows
Changing the Row Height to a Specific Height via Right-Click Menu
- Right-click the Row Header of the row that you want to change
- Select Row Height from the menu
- Change the number. If the number field is blank, enter any number. If you are unsure of what number to try, enter 30 and see what that looks like and then change it up or down from there.
- Press OK
This can be done to several rows at once by selecting the rows at its Row Header while holding down the Ctrl key on your keyboard.
Donna Young
Updated
About the V-Planner
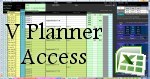 The V Planner is a spreadsheet file in xls and xlsx format. To use the file, you must have Microsoft Excel on your computer. The V Planner is available from YoungMinds web site. YoungMinds is online via a subscription and on Donna Young's Site-CD.
Read about the two different subscriptions available for DonnaYoung.org Some items are available for purchase from the Shopping Cart
Printable Gift Tags
 Printable gift tags, some are suitable for Christmas.
HWT Handwriting Practice Worksheets K-1
 Handwriting W/O Tears handwriting worksheets for beginners. The starter set "Basic Letter Practice" includes some form of guidance for all letters.
Handwriting Readiness
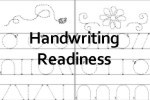 Handwriting Readiness is crazy popular. I've remade all of the files and added two more.

Copyright © 1999 - 2024 Donna Young, All Rights Reserved
![]() RSS Feed ·
Terms of Use ·
Privacy Policy ·
FAQ's ·
Blog ·
Site Index
RSS Feed ·
Terms of Use ·
Privacy Policy ·
FAQ's ·
Blog ·
Site Index
Subscribe to DonnaYoung.org Update Feed by Email


You are at DonnaYoung.org, online since 1998. Thank you for visiting my website. Donna Young