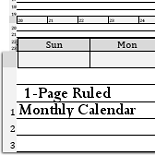
Donna's Small Desk Calendar
 Click on the image to see a larger version.
The stand is merely the card stock folded back and the ends folded to size and attached with glue and tape.
This step is mostly folding the upper and lower parts of card stock back and then folding the rest by sight based on the angle that you want the calendar to sit.
If you need measurements, see the image below. The back of the stand is around the same height as the calendar. The base is 2 inches deep.

Trimming one of the folded edges is optional. I trimmed the back to fit inside the bottom fold. I could have easily trimmed the bottom instead. At least one of the folds should stay so that you will have a flap to glue. I added clear packing tape to the back and bottom of my desk calendar.
After all of the folding, gluing, and taping was finished, I folded the bottom upwards in the middle, so the stand would have two points of contact instead of a flat bottom, which is not really going to be flat. You can see the middle fold in the photograph of the finished calendar above.


 A Completely New, made from scratch Grades and Attendance XLS file!
 Drawing & Sighting
 While getting the site-cd updated I noticed the super-nifty "Surrounded by a Calendar" row planners